Milestone Projects
Here is a compilation of the milestone projects that I have done this semester!
Objectified Response:

Process:
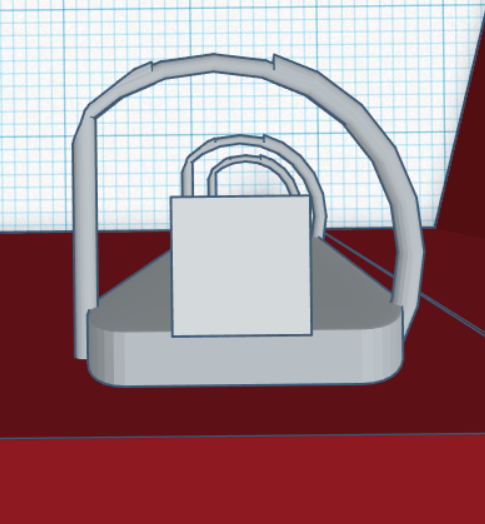
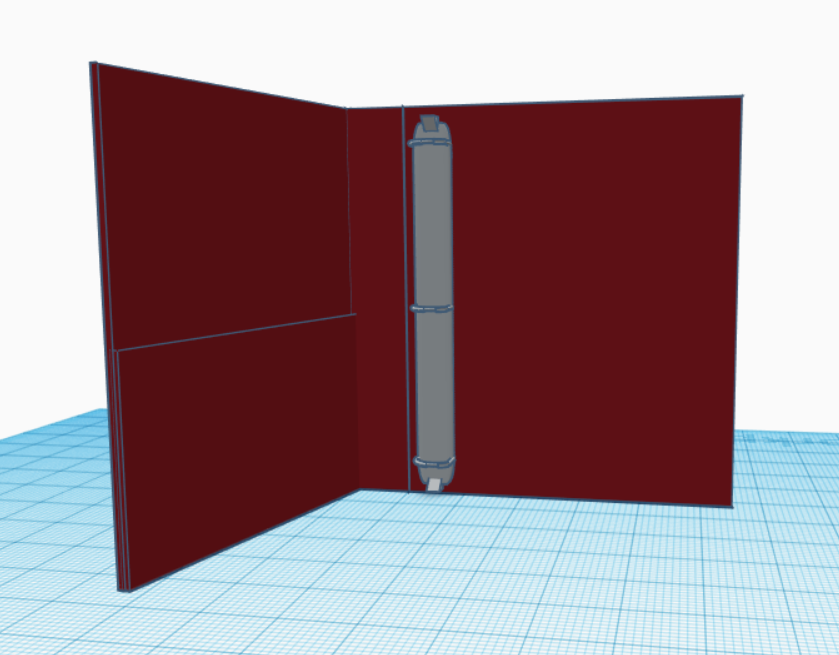
This was a pretty simple project that we had to make in response to the Objectified documentary film. There are so many objects that we don't even think about who designed them. One of my most used objects are ring binders. I never really considered how much design and consideration goes into the rings. They are flat on one side to keep the papers flat, but rounded on the other to make the binder close easier. There are also small levers on the sides that allow the user to open all rings at the same time, making sure that each ring gets the same amount of pressure and does not wear out or bend one ring only.
I used Tinkercad to make this binder. I didn't spend much time on it as it was a pretty simple project. I don't have any preliminary designs for this as the assignment didn't require it.
Mesh Mashup


Process:
For this project I had a lot of options as to what I could choose to do. Initially I chose another design that I thought would be really simple to make but in the end I ended up not liking it, as the designs of my classmates looked so unique and creative. I wanted to meet that standard, so I streamed towards a more complicated design. I was initially discouraged from choosing this design because tinkercad was a program that couldn't handle the amount of polygons that the final has, so I had to settle for a low-res flat version of a ballerina. I was unsatisfied with the result, but Meshmixer allowed me to use an actual 3d ballerina. I was finally able to render my concept. I later coloured and added details to the model in Rhino.
The biggest challenge was my lack of experience in Meshmixer. I kept messing up and having to restart the process over and over again. I also didn't know how to use faces, so the model was weirdly coloured initially. Thankfully Rhino was easier to understand for me so I managed to make it exactly how I wanted.
Papercraft Project


Process:
This was by far my favourite project out of all of them. I got to decide what I get to make completely myself and I really liked having that creative freedom. I chose to make a penguin model based on a stuffed toy that I had in my childhood. I didn't find the 3d design part of the process too challenging as I found Rhino to be really easy to work in. I had to get the cardstock laser cut on campus as I didn't have a colour printer, so it would be impossible for me to print lines on black. During the laser cutting process I realised that there was a mistake in the wing design. The small triangles at the top fell off. The reason why is because this project did not allow for any curved surfaces, so I had to make everything flat. Somehow the wing design couldn't be made completely flat so there was a gap between one of the triangles. After the laser cutting failure, I decided to just settle with a slightly curved surface on the wings as it was too late into the process to redesign it.
The most complicated part of the project was the glueing part. It was very hard to glue the pieces together as it was a closed space. After talking about it with my classmates as well as the prof, I decided to leave a small hole at the bottom of the design so that I could get my hands on the inside to glue the flaps together. In the trial run, the head was not attached, but just slipped on. I managed to get it attached to the body securely by using this method.
Hybrid 3d Model: Group Project with Daniela Szeoke


Comments
Post a Comment